Hyundai Tucson: Five-step Troubleshooting
- Verify the complaint
Turn on all the components in the problem circuit to verify the customer complaint. Note the symptoms. Do not begin disassembly or testing until you have narrowed down the problem area.
- Analyze the schematic
Look up the schematic for the problem circuit.
Determine how the circuit is supposed to work by tracing the current paths from the power feed through the circuit components to ground. If several circuits fail at the same time, the fuse or ground is a likely cause.
Based on the symptoms and your understanding of the circuit operation, identify one or more possible causes of the problem.
- Isolate the problem by testing the circuit.
Make circuit tests to check the diagnosis you made in step 2. Keep in mind that a logical, simple procedure is the key to efficient troubleshooting.
Test for the most likely cause of failure first. Try to make tests at points that are easily accessible.
- Fix the problem
Once the specific problem is identified, make the repair. Be sure to use proper tools and safe procedures.
- Make sure the circuit works
Turn on all components in the repaired circuit in all modes to make sure you've fixed the entire problem. If the problem was a blown fuse, be sure to test all of the circuits on the fuse. Make sure no new problems turn up and the original problem does not recur.
Battery Reset
Description
When reconnecting the battery cable after disconnecting, recharging battery after discharged or installing the memory fuse located on the driver's side panel after removing, be sure to reset systems mentioned on the below table.
In addition, when replacing or reinstalling their fuses after removing, they should be reset according to the below table. Please refer to the below table when servicing.
Auto up/down window
- Whenever the battery is disconnected, discharged or the related fuse is replaced or reinstalled, reset the Auto up/down window system according to the procedure below.
- You need to reset the sunroof motor to its default settings for the following cases :
- The sunroof motor loses battery power temporarily because the battery or fuse is replaced or the battery has died.
- The automatic opening or closing of the sunroof, a one-touch feature, does not function properly.
- The sunroof reopens during automatic closing even if there is no object caught in the sunroof (safety feature)
- 1) Turn the ignition switch to the ON position.
2) Pull up the power window switch in order that the window can close completely, and then keep pulling up the power switch for about 1 second.
Panoramaroof
Whenever the battery is disconnected, discharged or the related fuse is replaced or reinstalled, the panoramaroof system must be reset according to the procedure below.
- Turn the ignition key to the ON position and then close the panoramaroof completely.
- Release the panoramaroof control lever.
- Press and hold the CLOSE button for more than 10 seconds until the sunroof has moved slightly.
- Release the panoramaroof control lever.
- Press and hold the CLOSE button once again until the sunroof do as follows.
- Tilt -> Slide Open -> Slide Close
Then, release the lever.
- Reset procedure of panorama system is finished.
Trip computer
When the battery is disconnected and reconnected, the set functions of the trip computer become initialized. So, you need to explain this information to the customer.
Clock
Whenever the battery terminals or related fuses are disconnected, you must reset the time in audio head unit. (Refer to Audio owner's manual)
Audio
When the battery is disconnected and reconnected, the customer's radio stations become initialized. So, you need to record the customer's radio stations prior to service, and after service, set the customer's radio stations into the audio.
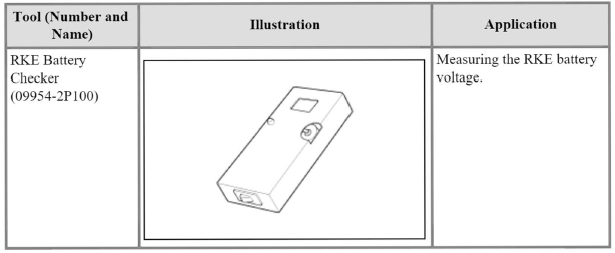
Special Service Tools

READ NEXT:
 Display audio - Removal
Disconnect the negative (-) battery terminal.
Remove the front monitor lower cover (A).
Remove the front monitor lower cover after disconnecting the mood lamp
connector
Remove front monitor side cover (A) and (B).
 Audio - Removal
Disconnect the negative (-) battery terminal.
Remove the front monitor lower cover (A).
Remove the front monitor lower cover (A) after disconnecting the mood
lamp connector (A).
Remove front monitor side cover (A) and (B).
SEE MORE:
 Why didn't my air bag go off in a
collision?
There are certain types of accidents in
which the air bag would not be expected
to provide additional protection. These
include rear impacts, second or third
collisions in multiple impact accidents,
as well as low speed impacts. Damage to
the v
 Parking Distance Warning (PDW)
Description
PDW consists of 8 sensors (front: 4 units, rear : 4 units) that are used
to detect obstacles and transmit the result in three
separate warning levels, the first, second and third to IBU via LIN
communication.
IBU decides the
Information
- Home
- Hyundai Tucson - Fourth generation (NX4) - (2020-2023) - Owner's Manual
- Hyundai Tucson - Fourth generation (NX4) - (2020-2023) - Workshop Manual