Hyundai Tucson: External Control Valve Compressor Inspection (GDS)
Compressor type: Fixed type compressor, External control valve, Internal control valve.
In cases of fixed type and internal control valve, it is possible to inspect compressor's operation with clutch noise.
When it comes to External control valve, however, it cannot be checked in this way bacause it doesn't have a clutch.
So, ECV should be inspected with GDS as below.
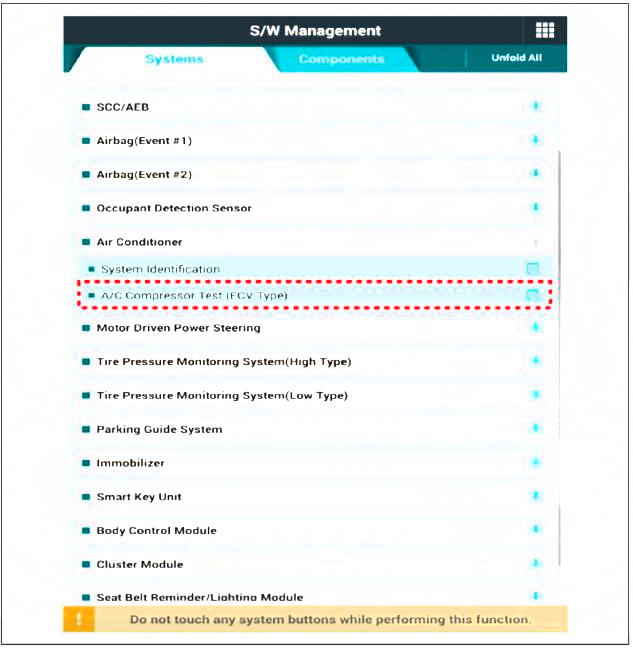
- Connect GDS to the vehicle and select 'Aircon Compressor Test(ECV type)'
ECV1
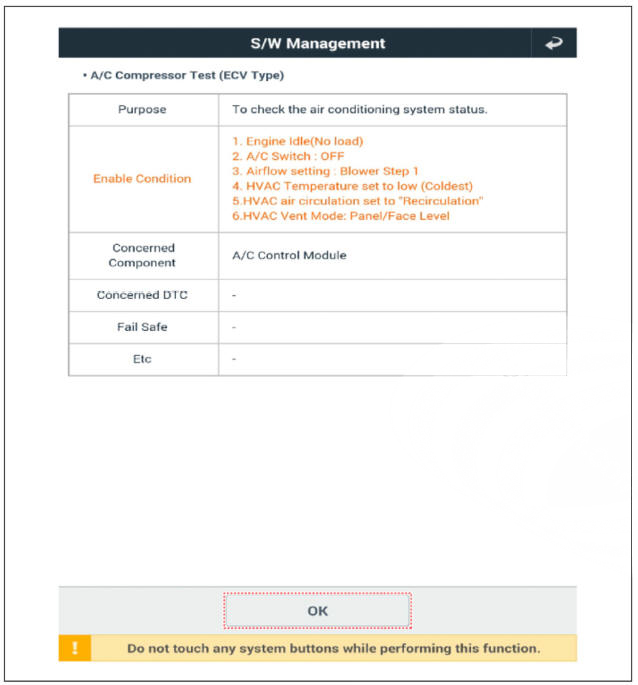
- Make the vehicle ready as the GDS instruction on the monitor. (Turn off A/C 'switch' only)
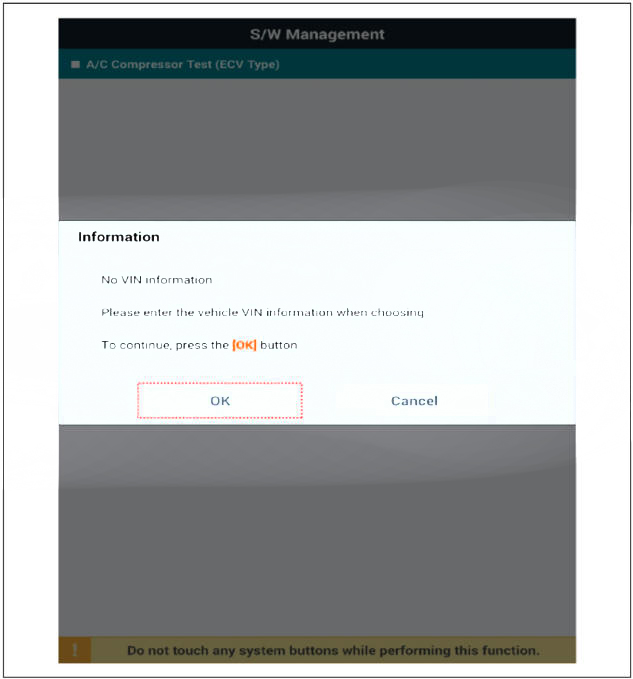
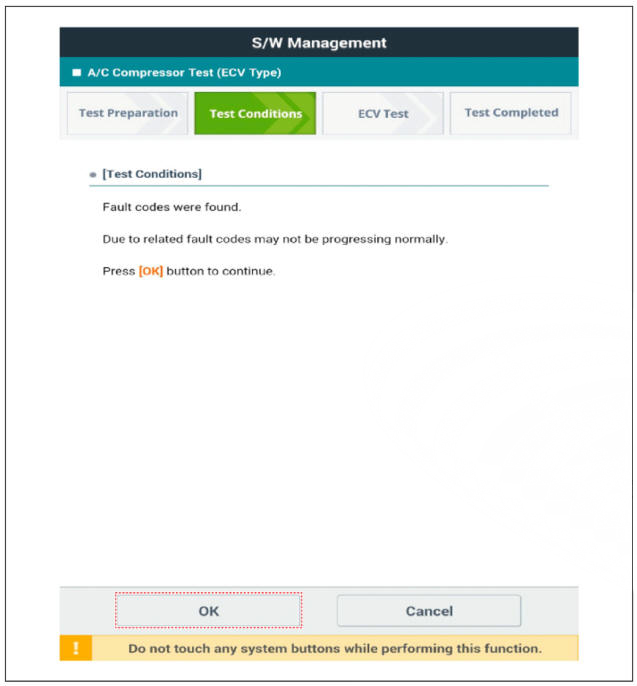
- Check if other DTC codes are found before inspect ECV compressor. If so, solve that problems first. If not, press 'OK' button to continue.
WARNING
Do not continue inspection if these DTC codes are found: B1241, B1242. B1672, B1685, B1686. B1687
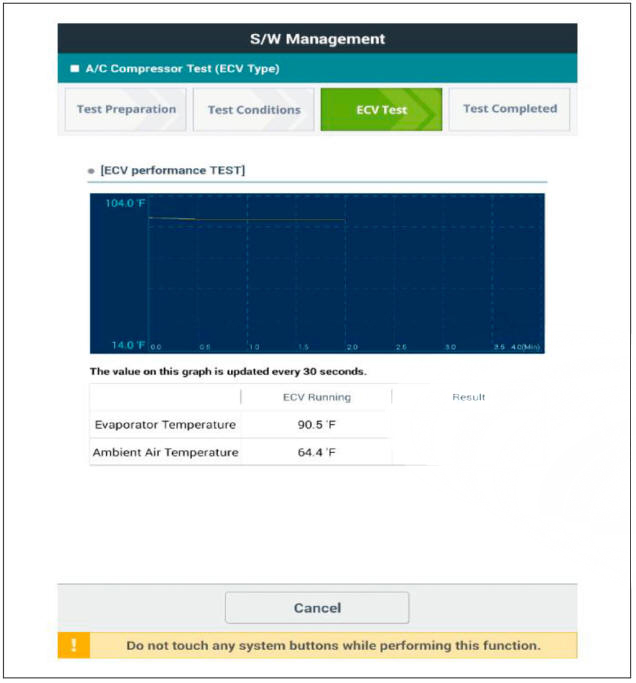
- Start inspection
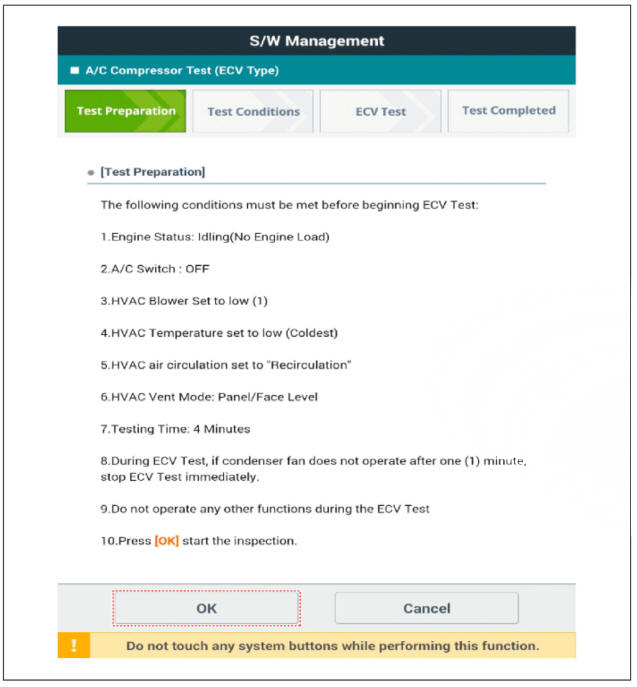
WARNING
Check if condenser fan is operating when condition is changed to 'ECV running'
WARNING
Relief valve will operate if condenser fandoesn't work due to overpressure in thecompressor. It helps the airconditiong system torelieve by releasing refrigerant and oil (losed ifrelieved).
- Refill refrigerant and oil after operation of relief valve
- Noise occurred when relief valve is in operation
- Check the result of inspection.
ECV7
ECV8
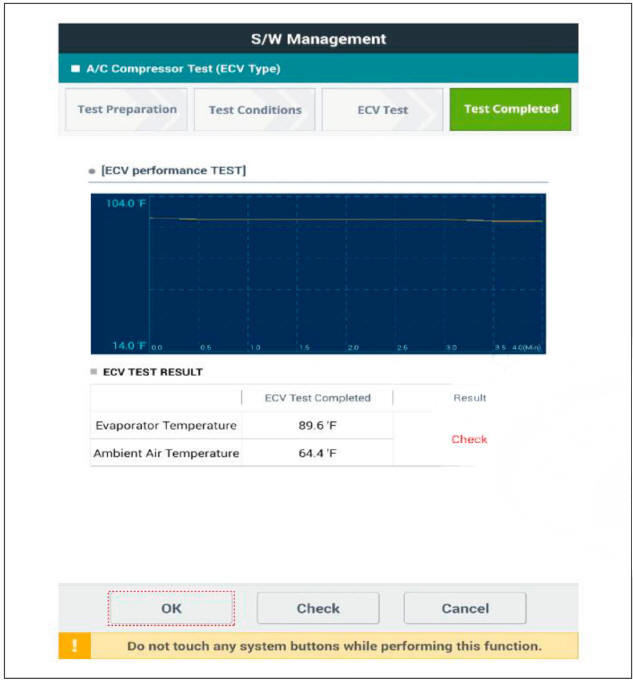
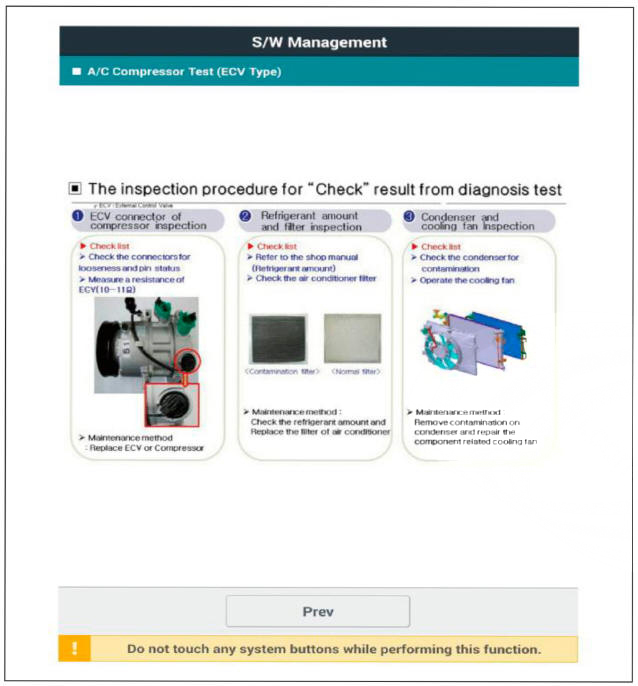
- If the result shows "Check", click "Check" and follow the instruction.
- Inspect ECV again from the first step.
READ NEXT:
 Compressor - Disassembly
Disassembly
Remove the front tire RH.
(Refer to Suspension System - "Wheel")
Loosen the drive belt.
(Refer to Engine Mechanical System - "Drive Belt")
Remove the clutch bolt (A) while holding the pulley with a clutch b
Condensor
Components Location
Condensor
Inspection
Check the condenser fins for clogging and damage. If clogged, clean them
with water, and blow them with compressed air. If
bent, gently bend them using a screwdriver or pliers.
Check the co
Condensor - Replacement
Remove the condensor.
(Refer to Air conditioning System - "Condensor")
Using a Lwrench, remove the cap (A) on the bottom of the receiver-drier.
Remove the receiver-drier (A) from condenser using a long nose plier.
Check
SEE MORE:
Operating door locks from outside the vehicle
Mechanical key
Pull out the door handle.
Press the release button (1) located
inside the bottom part of the cover
with a mechanical key or flat-head
screwdriver.
Carefully pull outward on the cover
while continuing to press the re
Air bag - supplemental restraint system
Driver's front air bag
Passenger's front air bag
Side air bag
Curtain air bag
The vehicles are equipped with a Supplemental Air Bag System for the driver's
seat and
front passenger's seats.
The front air bags are designed to sup
Information
- Home
- Hyundai Tucson - Fourth generation (NX4) - (2020-2023) - Owner's Manual
- Hyundai Tucson - Fourth generation (NX4) - (2020-2023) - Workshop Manual
