Hyundai Tucson: Condensor
Components Location
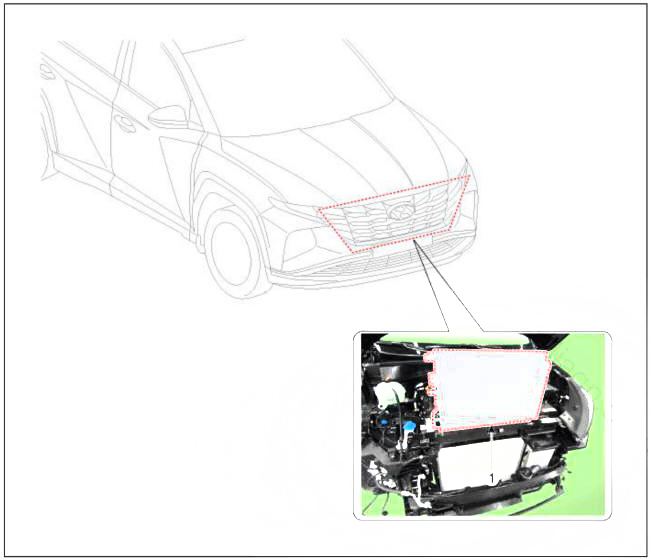
- Condensor
Inspection
- Check the condenser fins for clogging and damage. If clogged, clean them with water, and blow them with compressed air. If bent, gently bend them using a screwdriver or pliers.
- Check the condenser connections for leakage, and repair or replace it, if required.
Replacement
- Recover the refrigerant with a recovery/recycling/charging station.
(Refer to Air conditioning System - "Repair procedures")
- Disconnect the negative (-) battery terminal.
- Remove the front bumper assembly.
(Refer to Body - "Front Bumper Assembly")
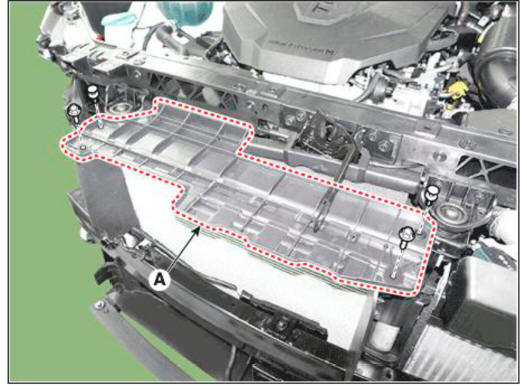
- Loosen the mounting botls and clips, remove the radiator upper guard (A).
Tightening torque : 3.9 - 5.9 N.m (0.8 - 1.2 kgf.m, 2.9 - 4.3 lb-ft)
- Loosen the mounting bolt, remove the upper air guard (A).
Tightening torque : 3.9 - 5.9 N.m (0.8 - 1.2 kgf.m, 2.9 - 4.3 lb-ft)
LH
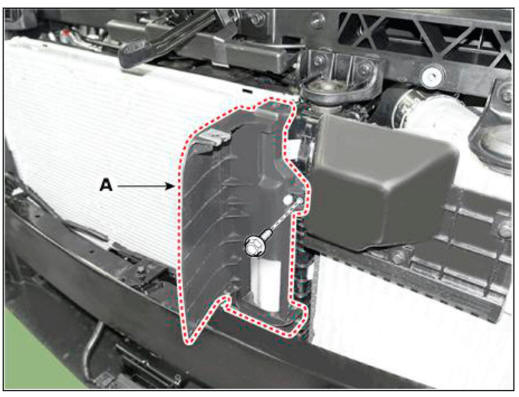
RH

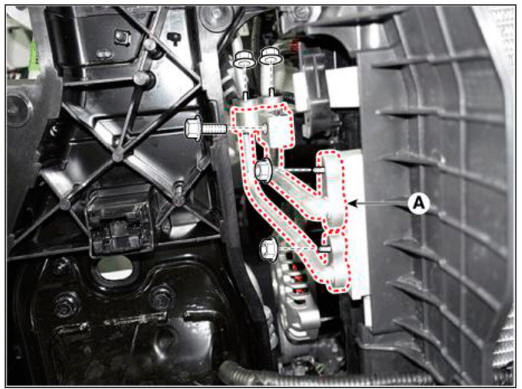
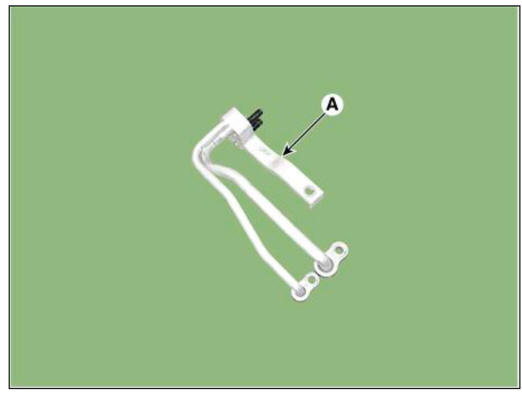
- Loosen the mounting nuts and separate liquid line (A).
Tightening torque : 7.8- 11.8 N.m (0.8 - 1.2 kgf.m. 5.8 - 8.7 lb-ft)
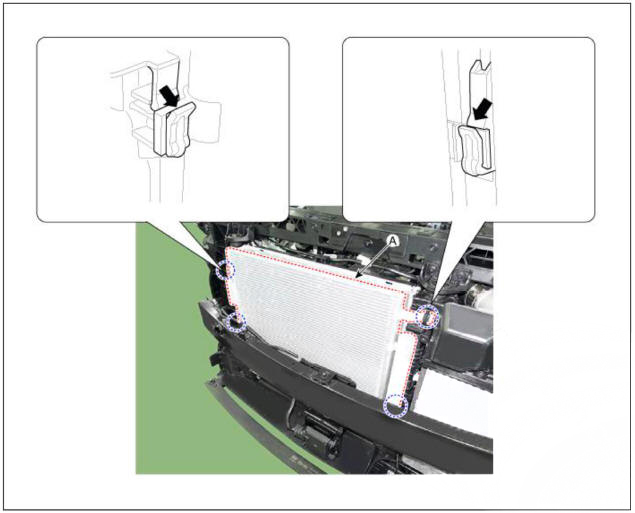
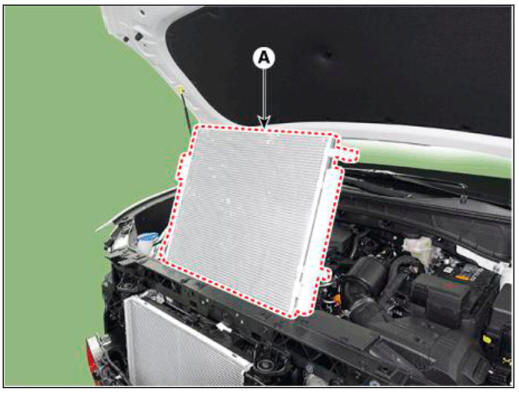
- Press the lock pin and remove the condenser assembly (A) from radiator assembly.
- Install in the reverse order of removal.
WARNING
- If you're installing a new condenser, add refrigerant oil.
- Replace the O-rings with new ones at each fitting, and apply a thin coat of refrigerant oil before installing them. Be sure to use the right O-rings for R-134a or R-1234yf to avoid leakage.
- Be careful not to damage the radiator and condenser fins when installing the condenser.
- Charge the system, and test its performance.
READ NEXT:
 Condensor - Replacement
Remove the condensor.
(Refer to Air conditioning System - "Condensor")
Using a Lwrench, remove the cap (A) on the bottom of the receiver-drier.
Remove the receiver-drier (A) from condenser using a long nose plier.
Check
Condensor - Inspection
WARNING
Before measuring the pressure of the refriferant line, check whether
the refrigerant amount is charged in
accordance with the specified charging amount.
(Refer to Heating, Ventilation, Air Conditioning - "Specifications")
In-car sensor
Components Location
In-car sensor
Replacement
Disconnect the negative (-) battery terminal.
Remove the crash pad center panel.
(Refer to Body (Interior and Exterior) - "Crash Pad Center Panel")
Using a screwdriver or re
SEE MORE:
Forward Collision-Avoidance Assist Operation
Basic function
Warning and control
The basic function for Forward Collision-
Avoidance Assist is to help warn and
control the vehicle depending on the
collision risk level : 'Collision Warning',
'Emergency Braking' and 'Stopping
vehicle and en
Front seat shield inner cover/ Front seat back cover
Component Location
Front seat shield inner cover
Replacement
WARNING
When removing with a flat-tip screwdriver or remover, wrap
protective tape around the tools to
prevent damage to components.
Put on gloves to prevent hand inj
Information
- Home
- Hyundai Tucson - Fourth generation (NX4) - (2020-2023) - Owner's Manual
- Hyundai Tucson - Fourth generation (NX4) - (2020-2023) - Workshop Manual
