Hyundai Tucson: In-car sensor
Components Location
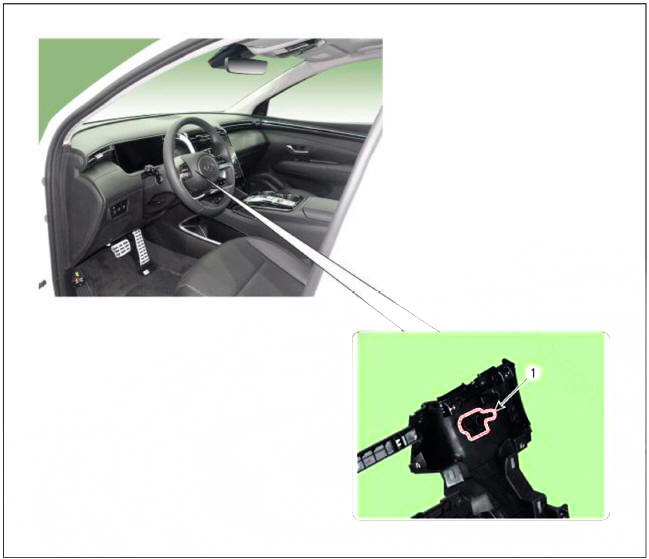
- In-car sensor
Replacement
- Disconnect the negative (-) battery terminal.
- Remove the crash pad center panel.
(Refer to Body (Interior and Exterior) - "Crash Pad Center Panel")
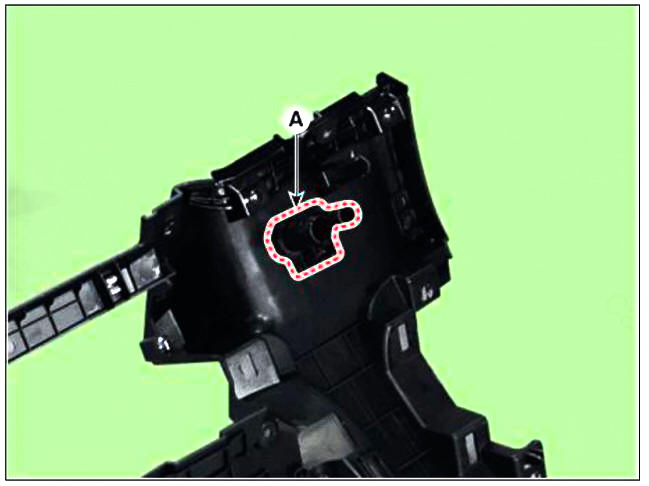
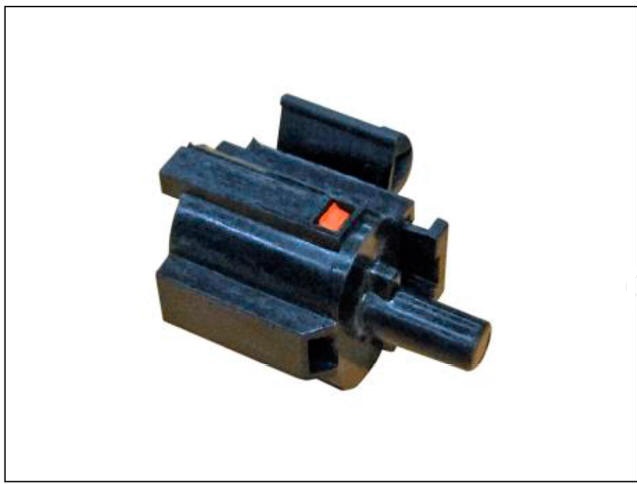
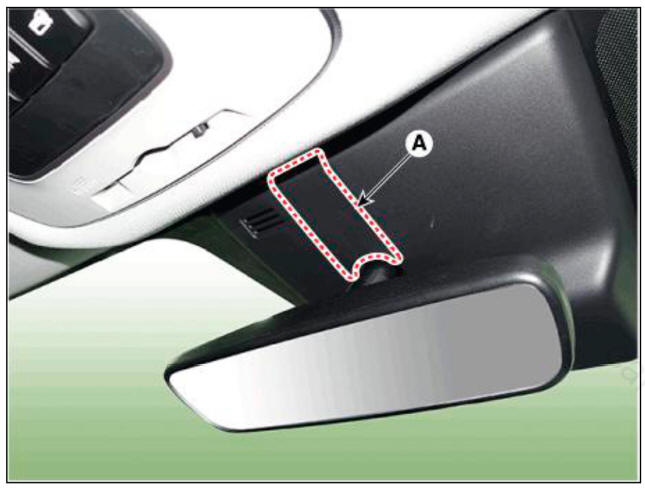
- Using a screwdriver or remover, remove the in-car sensor (A).
- Install in the reverse order of removal.
WARNING
- Replace any damaged clips (pin-type retainers).
- Make sure that each of the assembly components operates properly.
Description
- The photo sensor is located at the center of the defrost nozzles.
- The photo sensor contains a photovoltaic (sensitive to sunlight) diode. The solar radiation received by its light receiving portion, generates an electromotive force in proportion to the amount of radiation received which is transferred to the automatic temperature control module so that the solar radiation compensation will be performed.
Description
The ambient temperature sensor is located at the front of the condenser and detects ambient air temperature. It is a negative type thermistor; resistance will increase with lower temperature, and decrease with higher temperature.
The sensor output will be used for discharge temperature control, temperature regulation door control, blower motor level control, mix mode control and in-car humidity control.
WARNING
- If the ambient temperature is below 1.0ºC (33.8ºF), the A/C compressor will stop.
- The compressor will operate manually.
Inspection
- Check the resistance of the ambient temperature sensor between terminals 1 and 2 whether it changes by changing the ambient temperature.
Specification

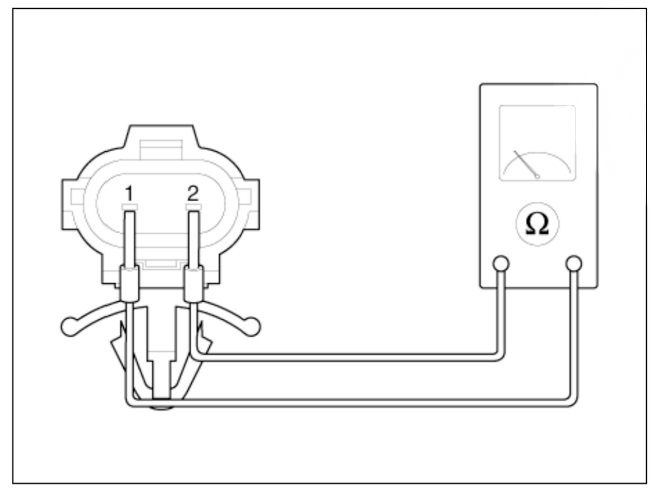
- Ambient Sensor (+)
- Sensor ground
Replacement
- Disconnect the negative (-) battery terminal.
- Remove the front bumper assembly.
(Refer to Body - "Front Bumper Assembly")
- Disconnect the connector (A) and then remove the ambient temperature sensor (B)
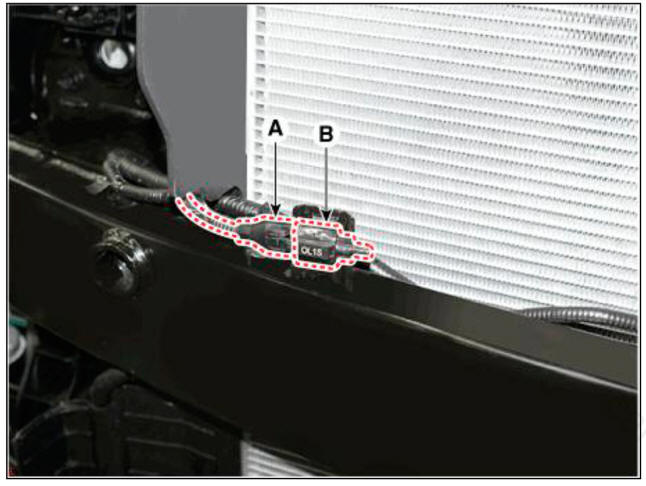
- Install in the reverse order of removal.
Description
The auto defogging sensor is installed on the front window glass. The sensor judges and sends signal if moisture occurs to blow out wind for defogging. The air conditioner control module receives signal from the sensor and restrains moisture and eliminate defog by controlling the intake actuator, A/C, auto defogging actuator, blower motor rpm, and mode actuator.
Replacement
- Disconnect the negative (-) battery terminal.
- Remove the inside rear view mirror cover (A).
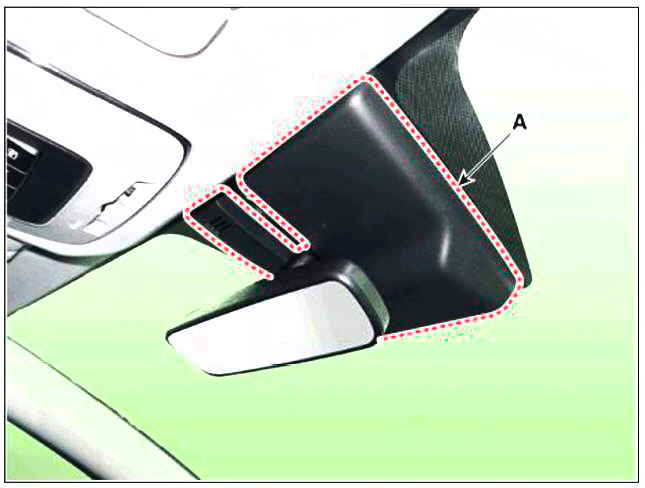
- Remove the rain sensor cover (A).
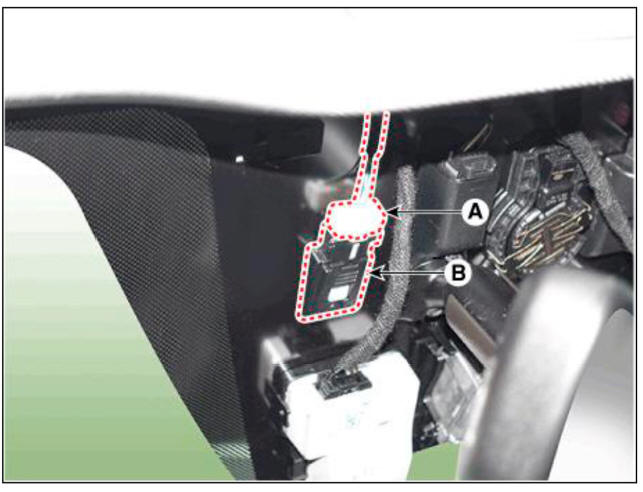
- Separate the auto defogging sensor connector (A) and remove the auto defogging sensor (B).
- Install in the reverse order of removal.
Description
Monitor the air quality inside the vehicle in real time (PM sensor) and display the status on the screen.
Automatically operate when fine dust concentration is high (Condition: Bet mode + A/C ON + 3rd speed or higher)
READ NEXT:
 PM sensor
Components Location
PM sensor
Replacement
Disconnect the negative (-) battery terminal.
Remove the crash pad lower panel.
(Refer to Body (Interior and Exterior) - "Crash Pad Lower Panel")
Loosen the mounting screw, remove
Heater unit assembly
Component Location
Heater unit assembly
Components
Heater unit assembly
Heater core cover
Heater core assembly
Mode control actuator LH
DEF duct seal
Evaporator assembly
Flange seal
Heater NVH pad
Temperature contro
SEE MORE:
Smart Cruise Control (SCC)
Smart Cruise Control is designed to
help detect the vehicle ahead and
help maintain the desired speed and
minimum distance between the vehicle
ahead.
Overtaking Acceleration Assist
While Smart Cruise Control is operating,
if the function judge
Driveshaft side oil seal #2 B Type
Remove the transfer assembly.
(Refer to 4 Wheel Drive (4WD) System - "Front Wheel Transfer Assembly")
Remove the dust cover (A).
Remove the oil seal #2 (A).
Install the oil seal #2 (A) with a new one by using t
Information
- Home
- Hyundai Tucson - Fourth generation (NX4) - (2020-2023) - Owner's Manual
- Hyundai Tucson - Fourth generation (NX4) - (2020-2023) - Workshop Manual
