Hyundai Tucson: Blower - Inspection
- Connect the battery voltage and check the blower motor rotation.
- If the blower motor does not operate well, substitute with a known-good blower motor and check for proper operation.
- Replace the blower motor if it is proved that there is a problem with it.
Replacement
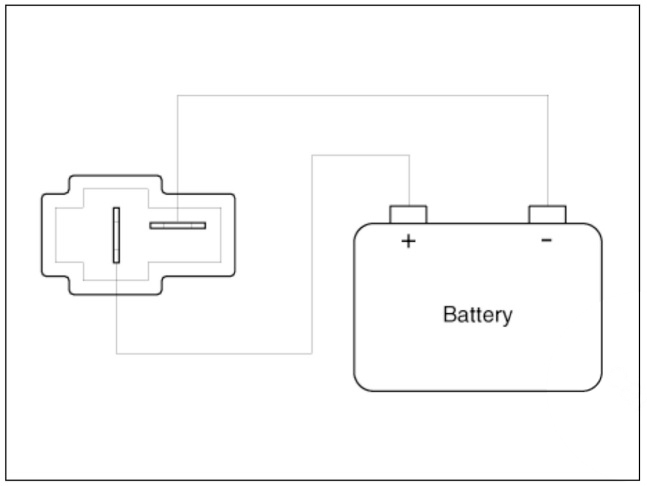
- Disconnect the negative (-) battery terminal.
- Press the lock pin (B) and then remove the crash pad under cover (A).

- Disconnect the blower motor connector (A) and then remove the blower motor (B) after loosening the screws.
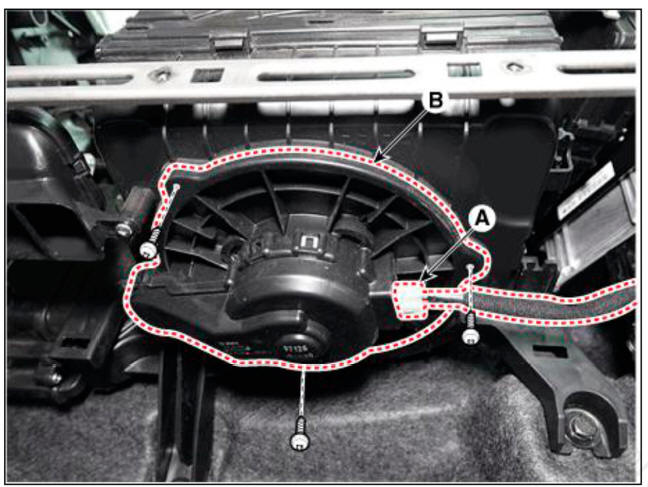
- Install in the reverse order of removal.
Inspection
- Measure the resistance between the terminals.
- The measured resistance is not within specification, the blower resistor must be replaced. (After removing the resistor)

Replacement
- Disconnect the negative (-) battery terminal.
- Remove the glove box.
(Refer to Body (Interior and Exterior) - "Glove Box")
- Disconnect the connector (A) and then remove the blower resistor (B) after loosening the mounting screws.
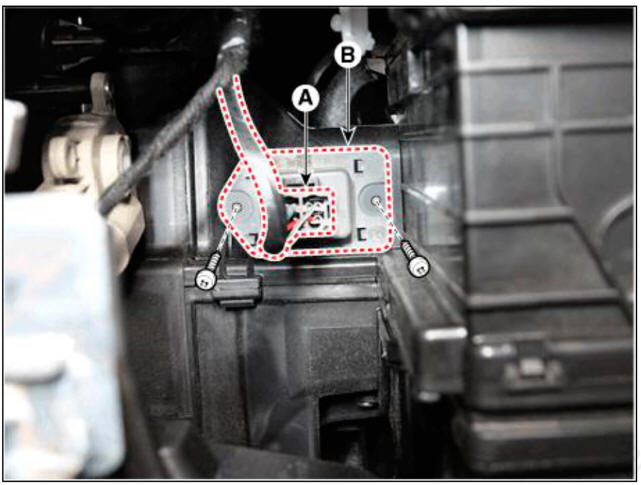
- Install in the reverse order of removal.
Inspection
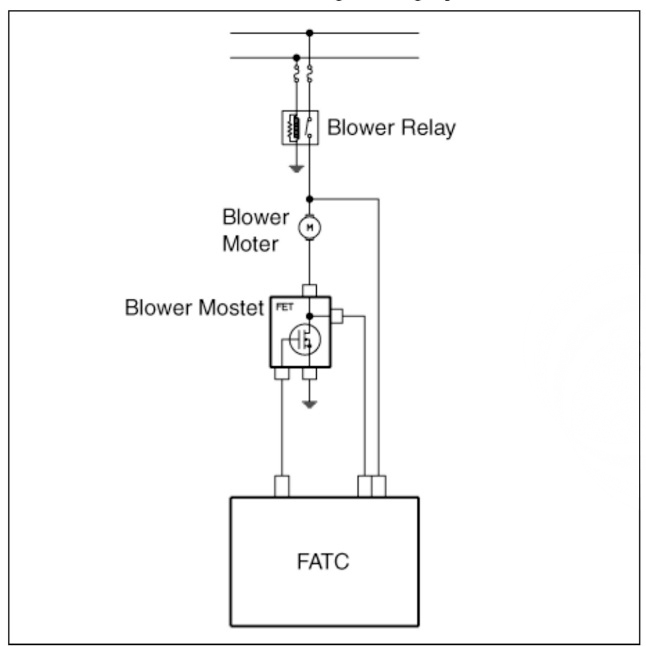
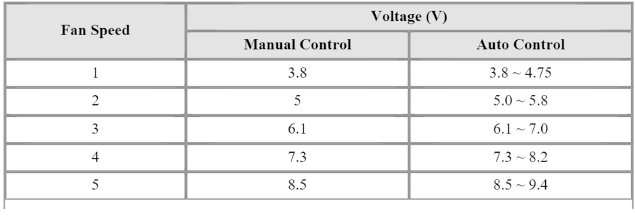
- Turn the ignition switch ON.
- Manually operate the control switch and measure the voltage of the blower motor.
- Select the control switch to raise the voltage until high speed.

Replacement
- Disconnect the negative (-) battery terminal.
- Remove the glove box.
(Refer to Body (Interior and Exterior) - "Glove Box")
- Disconnect the connector (A) and then remove the power mosfet (B) after loosening the mounting screws.
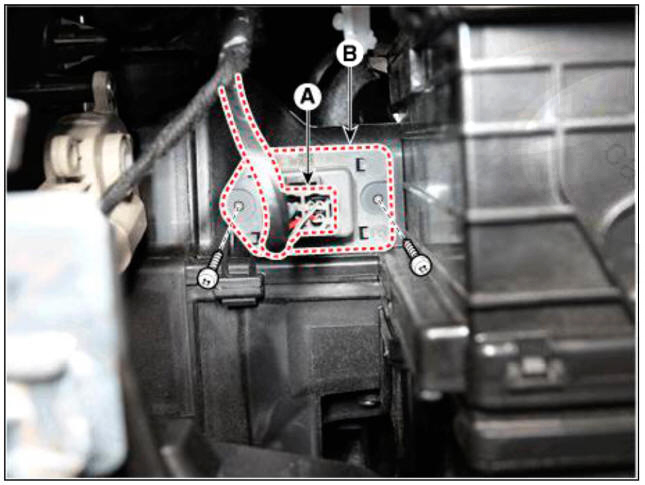
- Install in the reverse order of removal.
Description
The climate control air filter is located in the blower unit. It eliminates foreign materials and odor. The particle filter performs a role as an odor filter as well as a conventional dust filter to ensure comfortable interior environment.
Replacement
WARNING
- When removing with a flat-tip screwdriver or remover, wrap protective tape around the tools to prevent damage to components.
- Put on gloves to prevent hand injuries.
WARNING
Take care not to bend or scratch the trim and panels.
- Remove the glove box.
(Refer to Body (Interior and Exterior) - "Glove Box")
- Remove the filter cover (A) by pressing the knob.
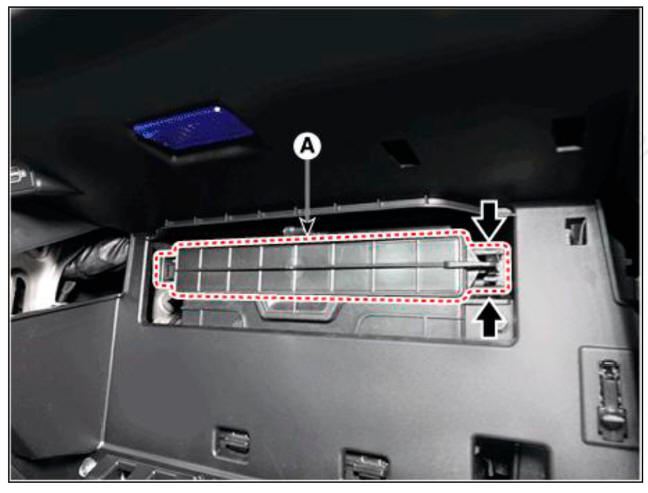
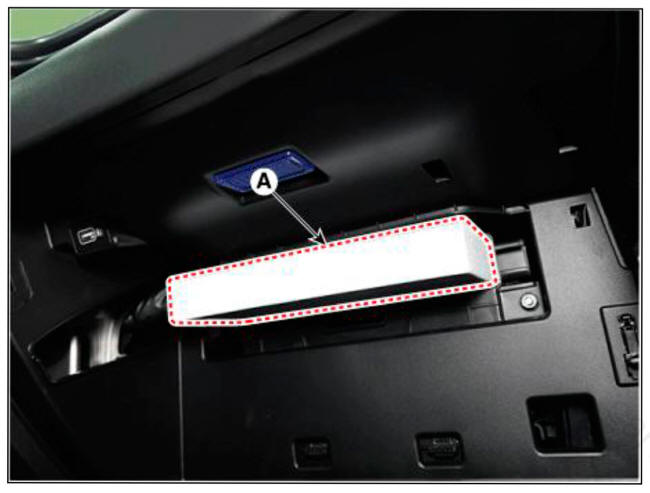
- Replace the air filter (A) with a new one according to the direction of air filter.
WARNING
- To remove the filter easily, press the right side inward then pull out the filter.
- In case of driving in an air-polluted area or rugged terrain, check and replace the air filter as frequently as possible.
- Install in the reverse order of removal.
Description
The intake actuator is located at the blower unit. It regulates the intake door by a signal from the control unit. Pressing the intake selection switch will shift between recirculation and fresh air modes.
READ NEXT:
 Intake actuator
Components
Intake actuator
Inspection
Turn the ignition switch OFF.
Disconnect the intake actuator connector.
Verify that the intake actuator operates to the fresh air position when
connecting 12V to terminal 3 and grounding ter
Controller
Component
Connector Pin Function
Replacement
Disconnect the negative (-) battery terminal.
Remove the front monitor.
(Refer to Body Electrical System - "Front Monitor")
Remove the heater & AJC control unit (A).
SEE MORE:
Engine Control Module (ECM)
ECM Terminal And Input/Output signal
ECM Terminal Function
Connector A
Connector B
Engine Control Module (ECM) - Removal
Removal
Turn ignition switch OFF and disconnect the battery negative (-)
terminal
AVN System
Description
AVN system
The AVN system has improved information search and easiness of manipulation
for the driver by
simplifying the system operation experience and unifying the display of the user
information such as
multimedia and car infor
Information
- Home
- Hyundai Tucson - Fourth generation (NX4) - (2020-2023) - Owner's Manual
- Hyundai Tucson - Fourth generation (NX4) - (2020-2023) - Workshop Manual
