Hyundai Tucson: Refrigerant System Service Basics (R- 134a)
Refrigerant Recovery
Use only service equipment that is U.L-listed and is certified to meet the requirements of SAE J2210 to remove HFC-134a(R-134a) from the air conditioning system.
WARNING
- Air conditioning refrigerant or lubricant vapor can irritate your eyes, nose, or throat.
- Be careful when connecting service equipment.
- Do not breathe refrigerant or vapor.
If accidental system discharge occurs, ventilate the work area before resume of service.
Additional health and safety information may be obtained from the refrigerant and lubricant manufacturers.
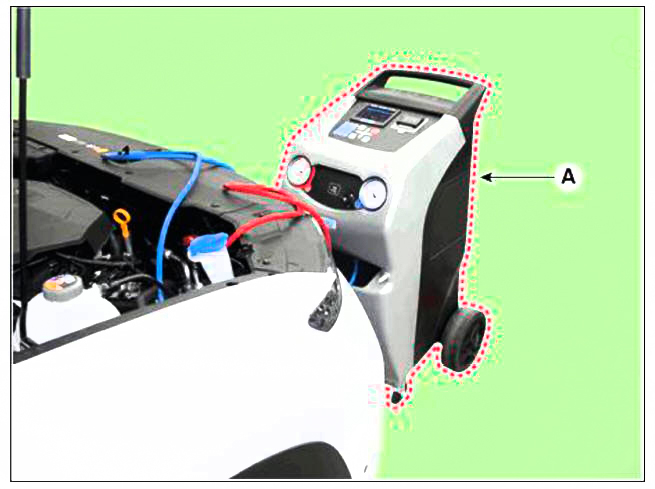
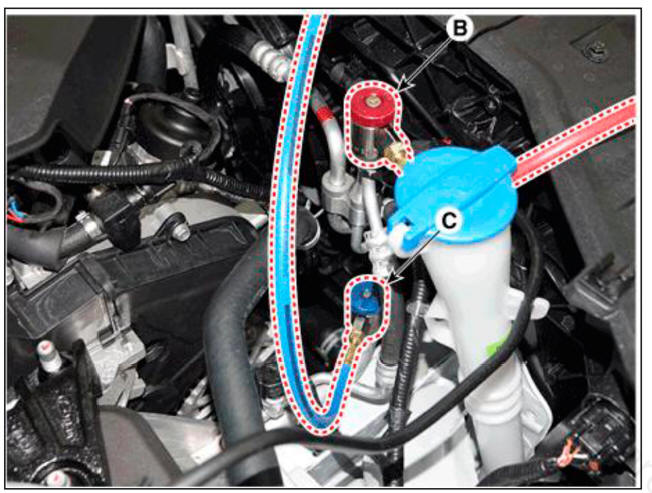
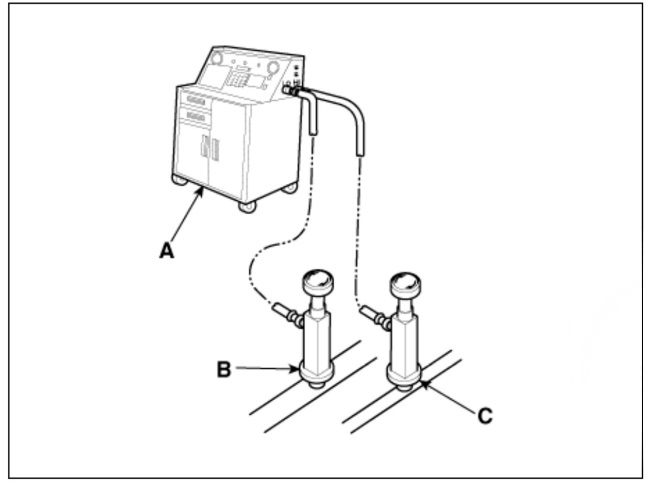
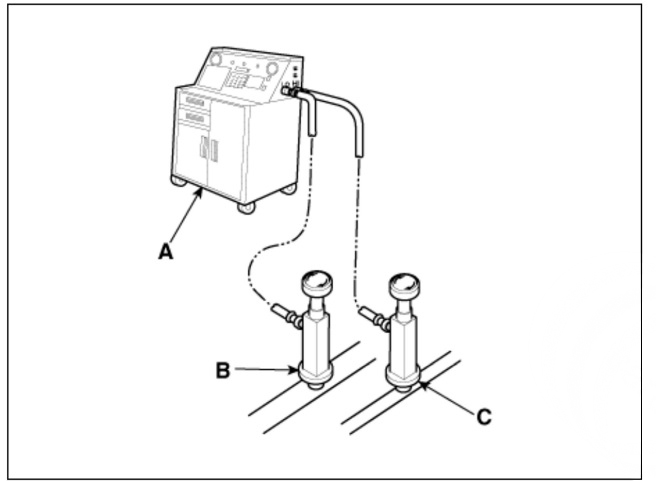
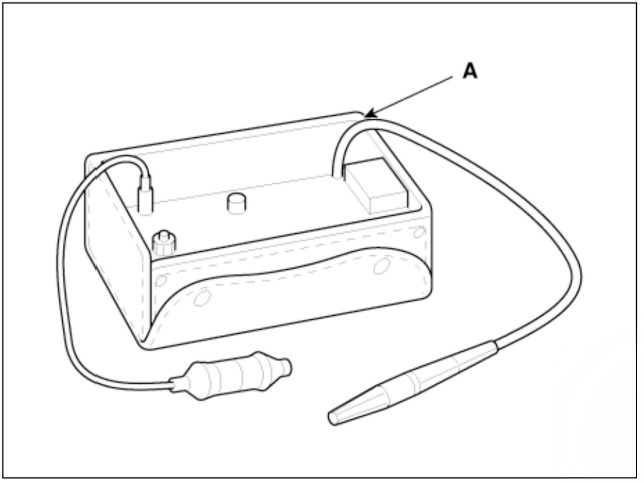
- Connect an R-134a refrigerant Recovery / Recycling / Charging System (A) to the high-pressure service port (B) and the low-pressure service port (C) as shown, following the equipment
- Measure the amount of refrigerant oil removed from the A/C system after the recovery process is completed. Be sure to install the same amount of new refrigerant oil back into the A/C system before charging.
System Evacuation
Use only service equipment that is U.L-listed and is certified to meet the requirements of SAE J2210 to remove HFC-134a(R-134a) from the air conditioning system.
WARNING
- Air conditioning refrigerant or lubricant vapor can irritate your eyes, nose, or throat.
- Be careful when connecting service equipment.
- Do not breathe refrigerant or vapor.
If accidental system discharge occurs, ventilate the work area before resume of service.
Additional health and safety information may be obtained from the refrigerant and lubricant manufacturers.
- When an A/C system has been opened to the atmosphere, such as during installation or repair, it must be evacuated using a R-134a refrigerant Recovery /Recycling/Charging system. (If the system has been open for several days, the receiver/drier should be replaced, and the system should be evacuated for several hours.)
- Connect a R-134a refrigerant Recoveiy/Recycling/Charging system (A) to the high-pressure service port (B) and the low-pressure service port (C) as shown, following the equipment manufacturer's instructions.
- If the low-pressure does not reach more than 93.3 kPa (700 mmHg, 27.6 in.Hg) in 10 minutes, there is probably a leak in the system. Partially charge the system, and check for leaks (see Refrigerant Leak Test.)
- Remove the low pressure valve from the low-pressure service port.
System Charging
Use only service equipment that is U.L-listed and is certified to meet the requirements of SAE J2210 to remove HFC-134a(R-134a) from the air conditioning system.
WARNING
- Air conditioning refrigerant or lubricant vapor can irritate your eyes, nose, or throat.
- Be careful when connecting service equipment.
- Do not breathe refrigerant or vapor.
If accidental system discharge occurs, ventilate the work area before resume of service.
Additional health and safety information may be obtained from the refrigerant and lubricant manufacturers.
- Connect a R-134a refrigerant
Recovery /Recycling/Charging system (A) to the high-pressure service port (B) as shown, following the equipment manufacturer's instructions.
- Add the same amount of new refrigerant oil to the system that was removed during recovery. Use only specified refrigerant oil. Charge the system with Single front only : 600 +- 25g (19.29 +- 0.88oz) R-134a refrigerant. Do not overcharge the system the compressor will be damaged.
Refrigerant Leak Test
Always conduct a leak test with an electronic leak detector whenever leakage or refrigerant is suspected and when conducting service operations which are accompanied by disassembly or loosening or connection fittings.
WARNING
In order to use the leak detector properly, read the manual supplied by the manufacturer.
If a gas leak is detected, proceed as follows:
- Check the torque on the connection fittings and, if too loose, tighten to the proper torque. Check for gas leakage with a leak detector (A).
- If leakage continues even after the fitting has been tightened, discharge the refrigerant from the system, disconnect the fittings, and check their seating faces for damage. Always replace, even if the damage is slight.
- Check the compressor oil and add oil if required.
- Charge the system and recheck for gas leaks. If no leaks are found, evacuate and charge the system again.
READ NEXT:
 Refrigerant System Service Basics (R- 1234yf)
Refrigerant Identification
Do not mix HFO-1234yf (R-1234yf) in the vehicle with other refrigerant,
such as R-12. R-134a and
etc.
Use only service equipment that is U.L-listed and is certified to meet
the requirements of SAE
standards
Suction & Liquid Pipe Assembly
Components
Suction & Liquid Pipe Assembly
Replacement
If a compressor is available, the air conditioner is operated for a few
minutes in the engine idle state and then
the engine is stopped.
Disconnect the negative (-) batte
Compressor
Components
Compressor
Components
Clutch bolt
Disc & Hub assembly
Snap ring (Rotor)
Pulley
Snap Ring (Stator)
Clutch spacer
Compressor
Electric Control Valve (ECV)
Electric Control Valve (ECV) snap ring
Removal
SEE MORE:
Cowl cross bar assembly
Component Location
Cowl cross bar assembly
Replacement
WARNING
When removing with a flat-tip screwdriver or remover, wrap
protective tape around the tools to prevent damage to
components.
Put on gloves to prevent hand injuries.
Power Tailgate Module - Component Location
Buzzer
Tailgate open switch (Crsah pad lower switch)
Fob key
Spindle Drive (2EA)
Tailgate inner switch
Power Latch
PTG Control Module
Tailgate Inner Switch
Failure Inspection
Diagnosis with diagnostic tool
In the body elec
Information
- Home
- Hyundai Tucson - Fourth generation (NX4) - (2020-2023) - Owner's Manual
- Hyundai Tucson - Fourth generation (NX4) - (2020-2023) - Workshop Manual
