Hyundai Tucson: Front door latch
Component Location
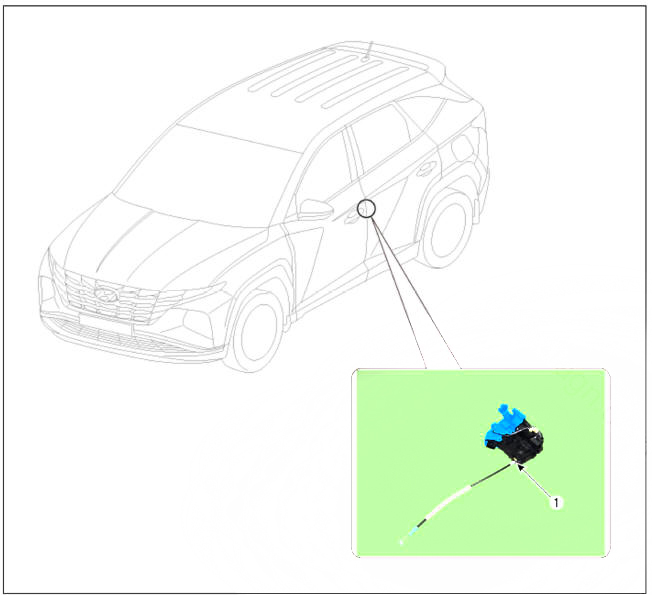
- Front door latch
Replacement
WARNING
- When removing with a flat-tip screwdriver or remover, wrap protective tape around the tools to prevent damage to components.
- Put on gloves to prevent hand injuries.
- Remove the front door outside handle.
(Refer to Front Door - "Front Door Outside Handle")
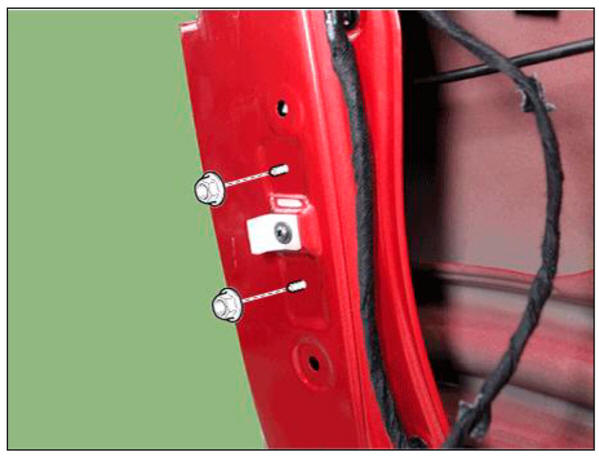
- Loosen the mounting nuts, remove the front door channel (A).

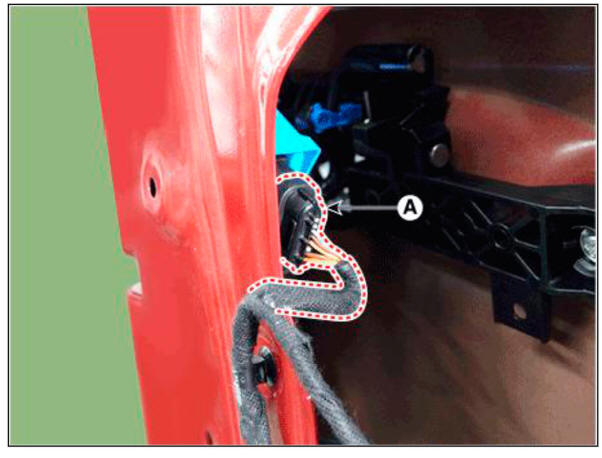
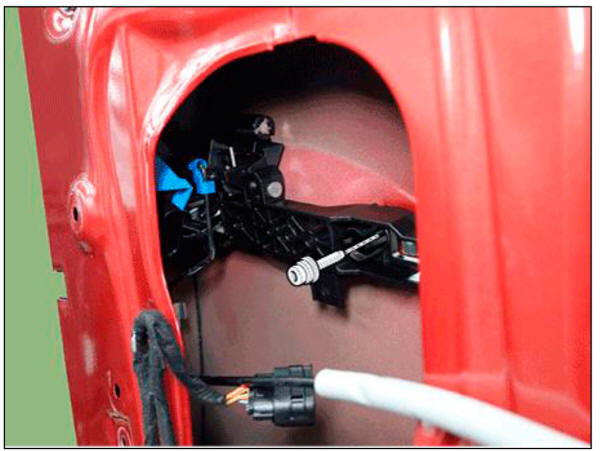
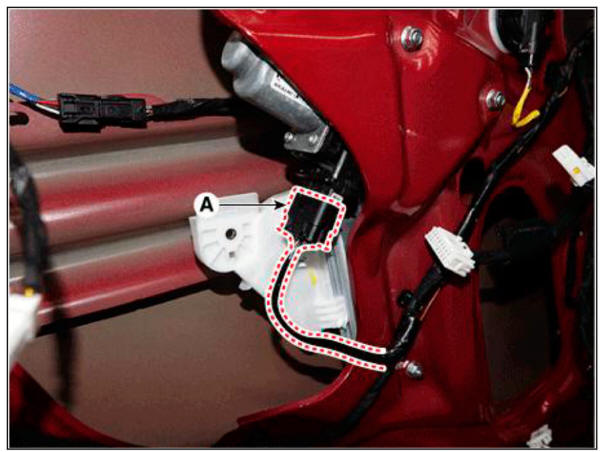
- Disconnect the front door latch connector (A).
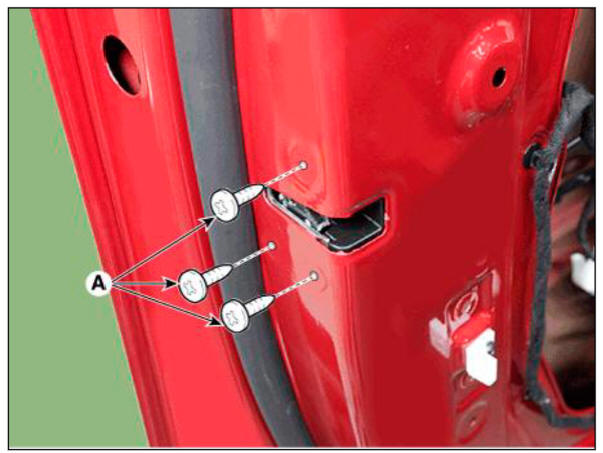
- Loosen the front door latch mounting screws (A).
Tightening torque : 7.8 - 14.7 N.m (0.8 - 1.5 kgf.m, 5.8 - 10.8 lb-ft)
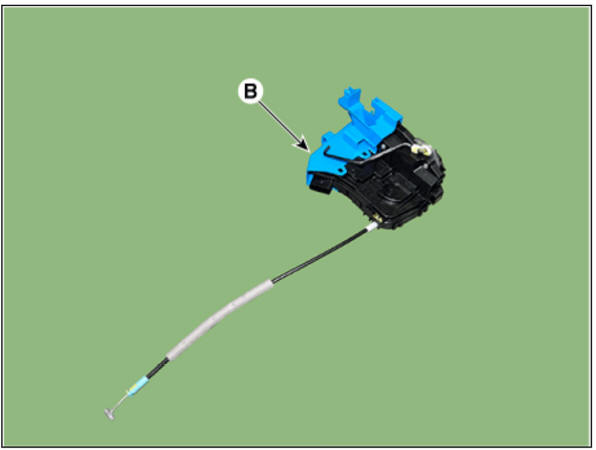
- Loosen the mounting screw, remove the front door latch assembly (A).
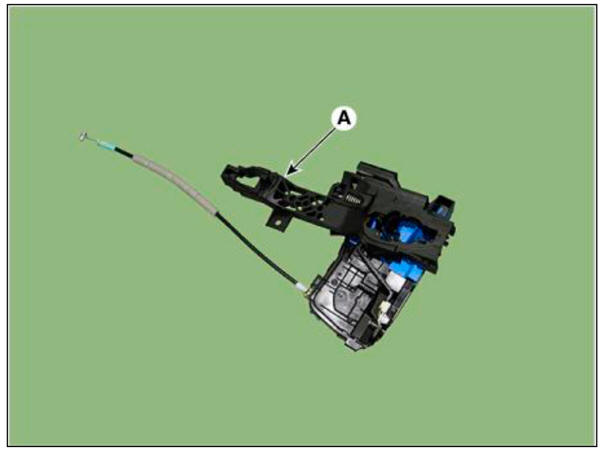
- Disconnect the lock pin (A) in the direction of the arrow and then separate the locking pin (A) and connecting rod (B).

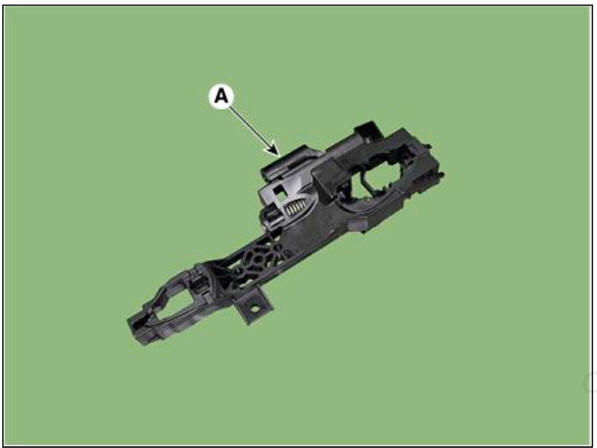
- Press the lock pin, remove the front door outside handle base (A).
WARNING
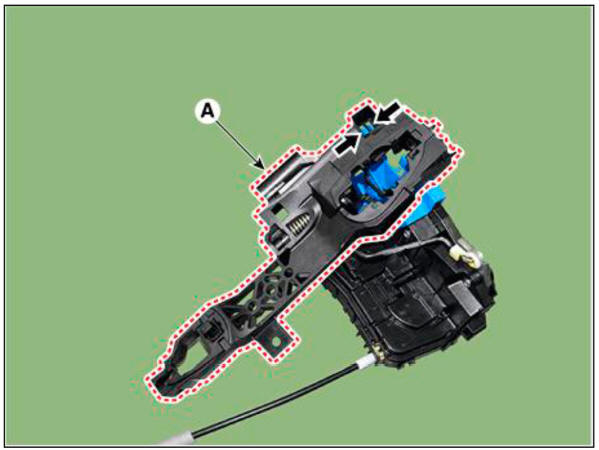
- Front door outside handle base (A).
- Front door latch (B).
- To install, reverse the removal procedure.
WARNING
- Replace any damaged clips (or pin - type retainers).
- Make sure the door locks and opens properly.
- Make sure the connector is connected properly.
Replacement
- Remove the front door window glass.
(Refer to Front Door - "Front Door Window Glass")
- Press the lock pin, separate the window motor connector (A).
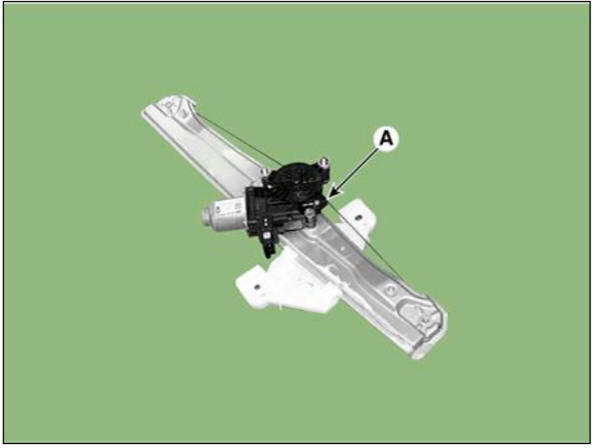
- Loosen the mounting nuts, remove the front door power window regulator (A).
Tightening torque : 3.9 - 5.9 N.m (0.4 - 0.6 kgf.m, 2.9 - 4.4 lb-ft)

- To install, reverse the removal procedure.
WARNING
- Make sure connectors are connected properly and each rod is connected securely.
- Make sure the door locks / unlocks and opens / closes properly.
READ NEXT:
 Rear Door - Glass Adjustment
WARNING
Check the glass run channel for damage or deterioration, and replace
them if necessary.
Remove the rear door trim.
(Refer to Rear Door - "Rear Door Trim")
Lower the glass by operating the power window switch until the gla
Rear door trim
Component Location
Rear door trim
Replacement
WARNING
When removing with a flat - tip screwdriver or remover, wrap
protective tape around the tools
to prevent damage to components.
Put on gloves to prevent hand injuries.
SEE MORE:
Timing System - Installation
Keep the liquid gasket sealing surfaces (timing chain cover, cylinder
head, cam carrier, cylinder block, lower
crankcase) free from foreign matters, cured sealant, oil, dust, moisture and
etc. Spray the cleaner on the sealing
surface and
Snow or icy conditions
The severe weather conditions of winter
quickly wear out tires and cause other
problems. To minimize winter driving
problems, you should take the following
suggestions:
You need to keep sufficient distance
between your vehicle and the vehicle i
Information
- Home
- Hyundai Tucson - Fourth generation (NX4) - (2020-2023) - Owner's Manual
- Hyundai Tucson - Fourth generation (NX4) - (2020-2023) - Workshop Manual
